In the first of this four part series, we take a detailed look at how to rehab your shoulder injury, starting with motion of the scapula.

Firstly please note that I haven’t met you and I can’t see your shoulder.
What I’m going to share is a thought process that will hopefully get you and your shoulder moving in the right direction.
If any of the exercises cause you pain, please stop and consult your physician.
A few basics before we begin
You’ll notice there are no stretches, mobilisations, or other release techniques mentioned.
This is because we’re not looking at limitations in range of motion through the prism of muscle tightness.
To do so is a dead end. Don’t waste your time with this stuff. You’ll be stretching and sticking spiky balls where the sun doesn’t shine for eternity.
The long term solution is to train your way out of your current situation. It’s this I’m going to help you with.
So where to start?
Shoulder injury rehab can present as a confusing puzzle. This is due to the wide variety of motions available at the shoulder and the number of muscles involved.
To make it easier we’re going to separate shoulder motion into two distinct parts, motion of the scapula (shoulder blade) and movement at the glenohumeral joint (where your upper arms meets your shoulder).
In this post we’ll look at how to assess and improve scapula motion which is critical to shoulder function.
In a subsequent post we’ll move on to motion at the glenohumeral joint.
Also note that limitations in your trunk, hips, ankles and feet can have knock on effects at the shoulder. Something I describe in this post.
That said let’s crack on.
How to assess scapula motion
We’re going break movement of the scapula down into 4 distinct motions, elevation, depression, protraction and retraction.
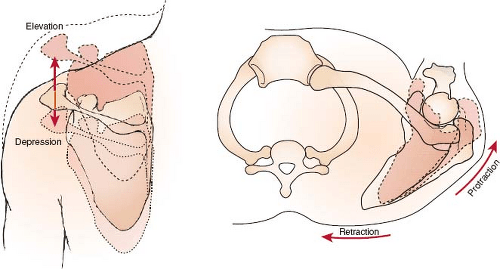
You’ll be comparing motion on one side of your body to the other and making a note of any large differences in range, particularly on your problematic side.
We’re looking for elephants here not field mice. If you can’t see a big difference and the quality of motion is comparable, move on.
Retraction assessment
This is the action of bringing your scapulae back towards your spine. The kind of thing that men do when they want to make their chests look bigger.
This is best assessed lying face down with your arms at your side and your forehead on a small towel so you can breath.
Retract each scapula back towards your spine without lifting your hands from the floor, or rotating your trunk.
How far did each move? Did they feel different? Was one side more difficult than the other? Did you experience any pain or clicking?
Have somebody eye ball the motion for you if you’re not sure. They’re looking at how close you’re able to get each scapula to your spine.
Protraction assessment
Now flip over onto your back with your arms by your side again.
This time you’re trying to move each shoulder towards the ceiling without lifting your arms. Think ‘bad posture’ but one at a time.
You should be able to see for yourself how high each shoulder comes up. If there’s any doubt, have somebody look at the distance between the edge of your shoulder (acromion process) and the floor.
Elevation assessment
Standing upright, preferably in front of a mirror, bring each shoulder up towards your ear without side bending your neck.
You’re looking at the gap between the top of your shoulder and your ear to see if there’s a difference in range of motion.
Depression assessment
From the same position, push each arm down towards the floor without side bending your trunk.
Again use the gap between your ear and the tip of your shoulder to see if there’s a noticeable difference.
Results
What did you find? Any big differences between each side?
I expect you may have found one or two limitations on the shoulder you have issues with.
Providing there are no structural differences between each shoulder, these differences likely represent deficits in your muscular system.
Great I hear you say, now what?
We’re going to make some improvements, with the magic of targeted resistance training.
Training scapula motion
For each limitation we’ll look at an exercise that is designed to improve it.
It’s important that you perform the exercises in a slow and controlled manner and follow the instructions as closely as possible.
Start light and listen to your body. If you feel pain stop.
Retraction exercise
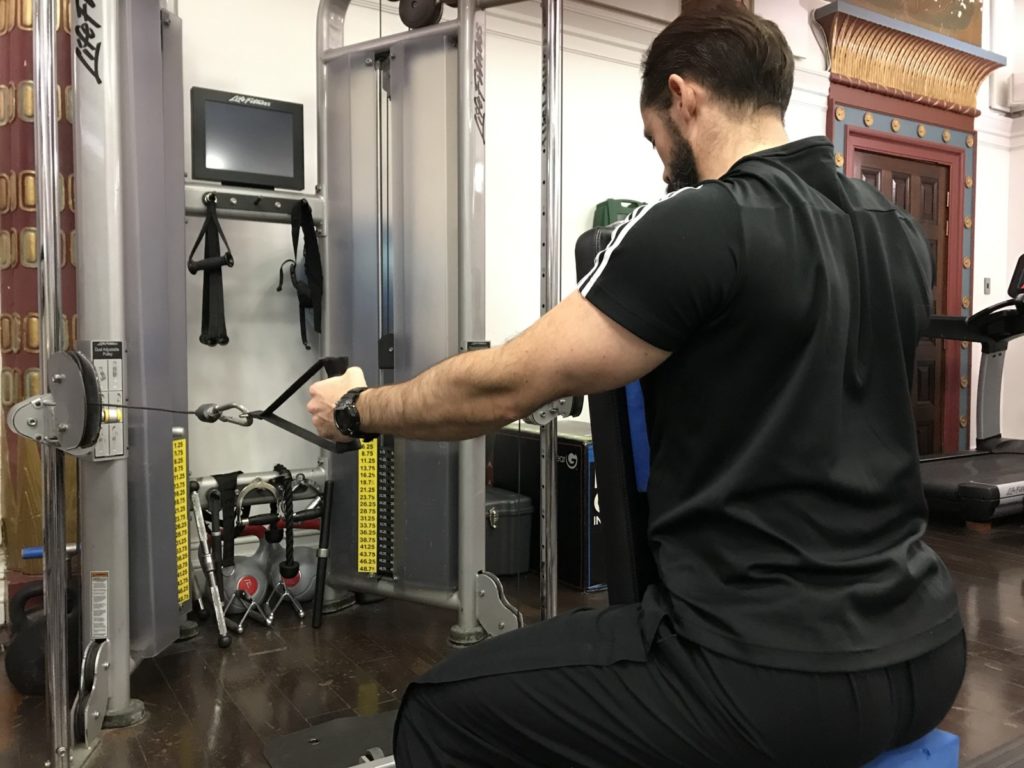
Ideally use a cable machine for this as pictured. A seated row machine can also be used, but note you may not achieve as much retraction due to the narrower width of the handles.
Set the cables at shoulder height and place a yoga block or something similar between your chest and the bench. This will provide restraint for your trunk and improve your ability to focus on the target muscles.
Before you begin measure how much active protraction you have by sitting up straight and pushing your arms towards the cable machine.
Note the distance your arms travel and don’t let the resistance take your further than this during the exercise.
Now take hold of the handles and slowly start to bring your scapulae back together without bending your elbows.
Hold the end range position for a second before slowly releasing back to the protraction limit you measured at the start.
Use a weight that begins to get challenging at around 6-8 repetitions.
You should feels this exercise in the muscles that sit between your shoulder blades.
Protraction exercise
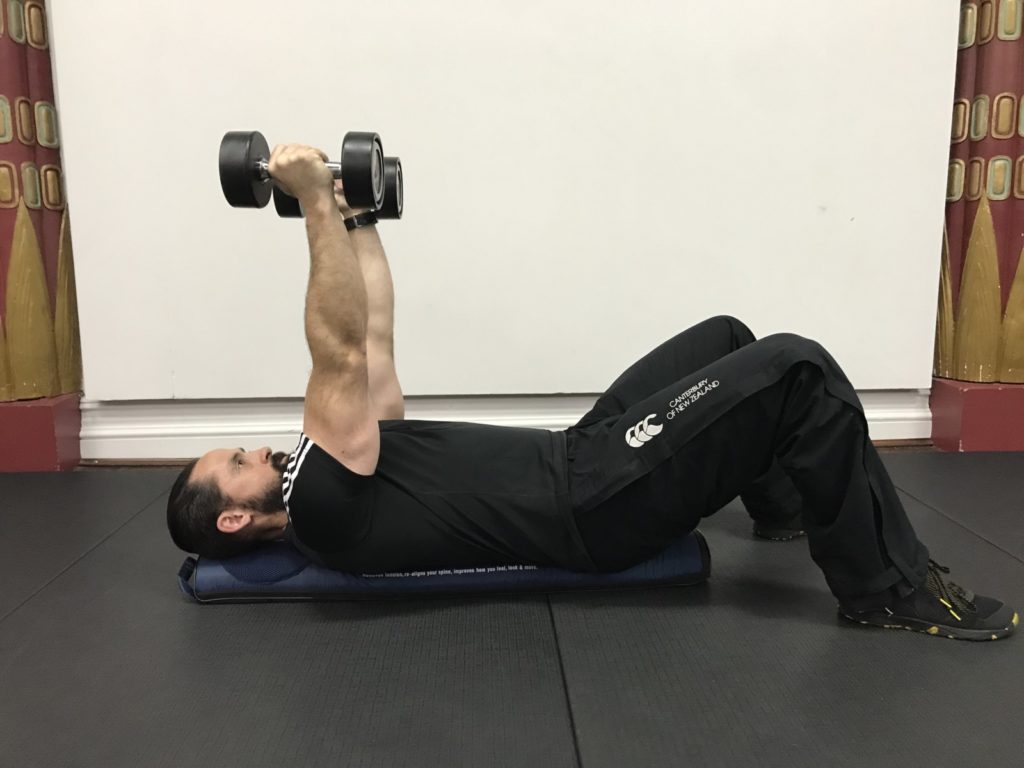
A foam roller works well for this because it enables retraction of your scapulae. This will increase the range of motion you’re able to work through.
First assess how much active retraction you have available and don’t let the resistance take you past this point during the exercise.
Now select some light dumbbells and with a straight elbow, begin to push the weights towards the ceiling.
Keep the dumbbells over your shoulders throughout.
Hold the top position for a second before slowly lowering to your retraction limit.
Again select a weight that begins to get challenging between 6 and 8 repetitions.
You should feel this exercise around the sides of your rib cage.
Elevation exercise
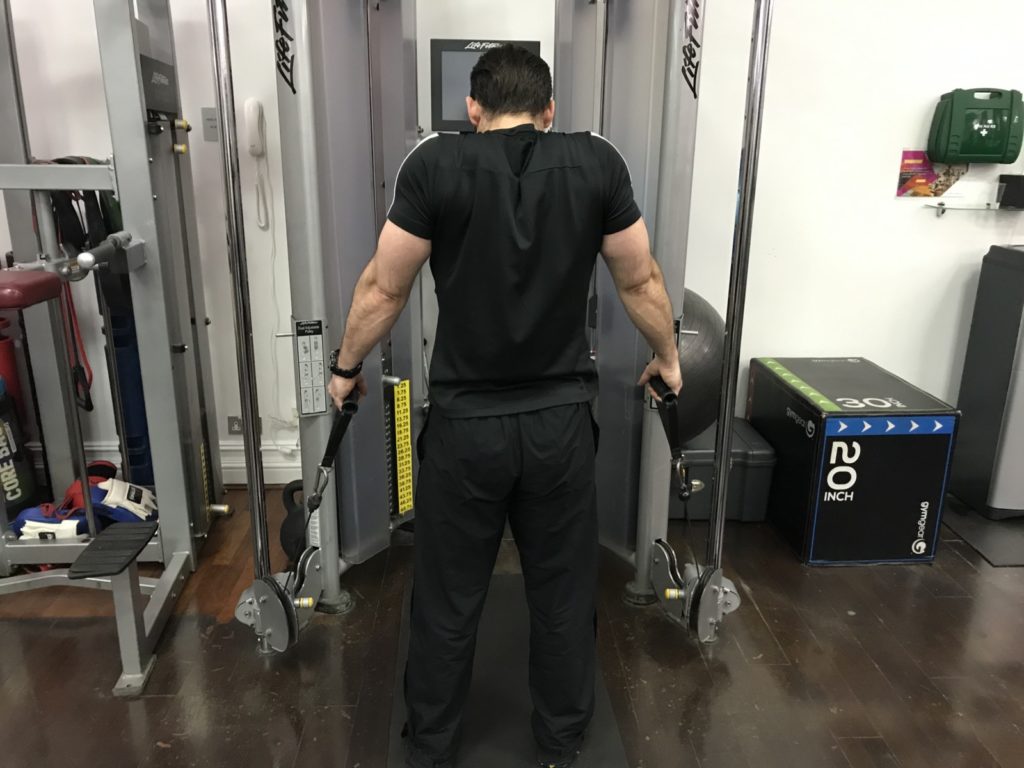
Ideally perform this exercise using cables as pictured. This will enable you to achieve more range of motion than if you use dumbbells due to the wider start position.
Standing between the cables with the cable set at the bottom position on each stack, push your arms down towards the handles to assess your active range of motion for depression.
Don’t let the resistance take you further than this during the exercise.
Now take hold of the handles and with straight elbows, begin to take your shoulders up towards your ears.
Hold to the top position for a second before slowly lowering to your depression limit.
Select a weight that starts to bring about fatigue in 6-8 repetitions.
You should feel this exercise in the muscles at the top of your shoulders.
Depression exercise
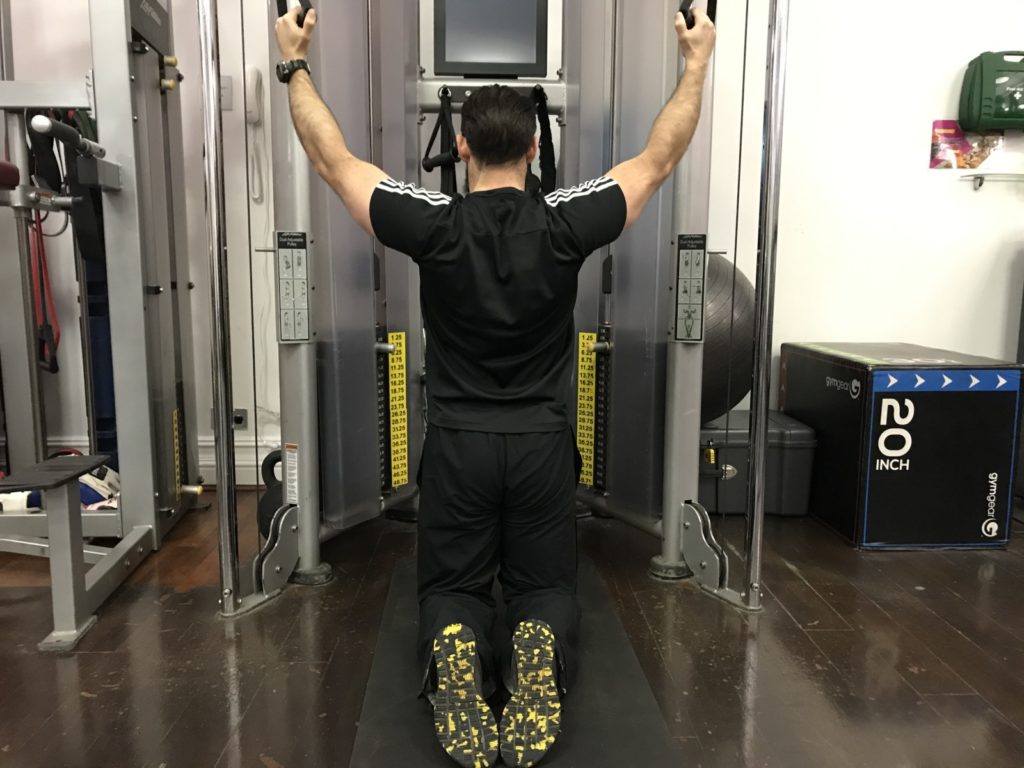
With the cables set at the highest position, kneel between the stacks. Take your arms overhead and push both hands up towards the handles to assess how much elevation you have available.
If the overhead position causes you issues, back out from the cable stacks until you can find a pain free position.
Take hold of the handles and come back to your start position.
Keeping your elbows as straight as possible, slowly pull your shoulder blades back down towards the floor. Hold the bottom position before slowly releasing up to your elevation limit.
Choose a resistance that becomes challenging around 6-8 repetitions.
You should feel this exercise around the bottom of your shoulder blades.
Summary
Improving motion at your scapulae will give you the foundation for better shoulder function.
In the next post we’ll look at how to assess and improve the function of your rotator cuff muscles.