In part 3 of this shoulder injury rehab series, we look at how to integrate your scapula motion and rotator cuff work, into training pressing and pulling motions.
So you’ve got your shoulder blade (scapula) moving a little better, and you’ve focussed on those deficits in your rotator cuff.
Now it’s time to start challenging your shoulders in more familiar gym based exercises.
How do you do that whilst minimising the risk of creating further issues for yourself?
Understanding and applying these five key principles will help.
1) Respect your active range of motion
First and foremost, respect your active range of motion during every exercise.
That means DO NOT allow a weight to take you into a position you don’t have muscular control of.
I’ll explain how to set up each exercise to ensure this is the case.
2) Reduce the forces at the shoulder joint
Adapt exercises to reduce the forces on the shoulder where possible.
The resistance you choose for any given exercise is only half of the story. The other half is influenced by the distance between the line of force (where the weight wants to go) and the joint itself.
This is known as the moment arm.
Reducing the moment arm to the shoulder joint will help reduce the forces that are acting on it.
This will help you to avoid negative sensations in and around the joint and enable you to focus your attention on the target of the exercise, the muscles.
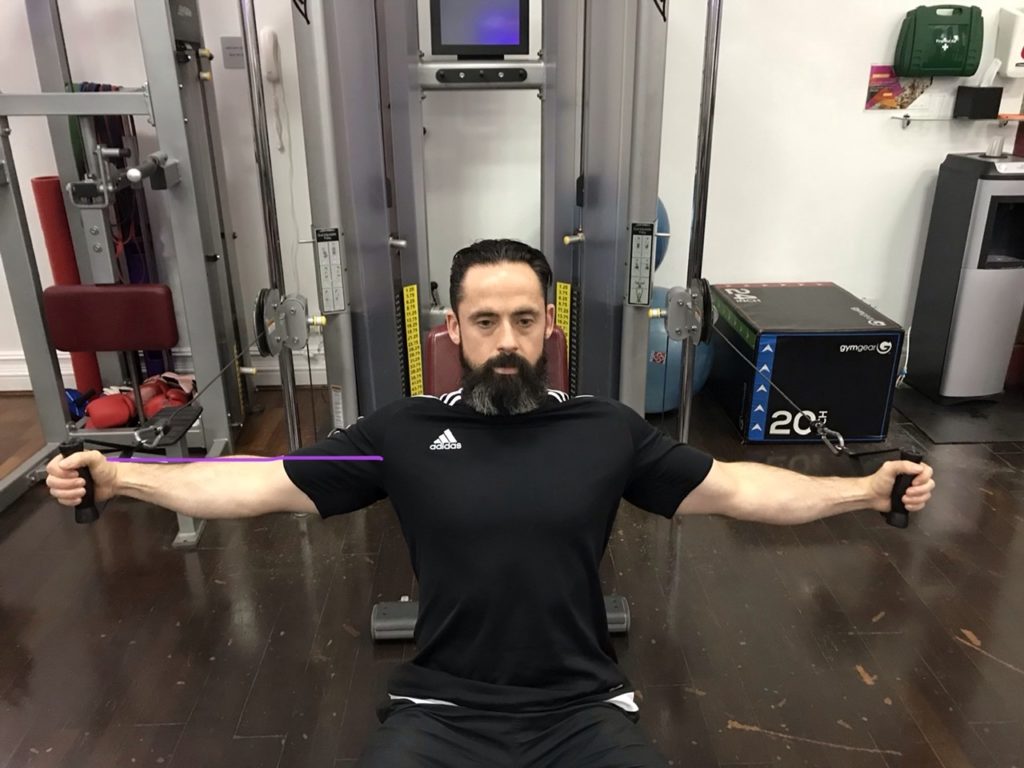
Let’s take a look at the chest fly exercise as an example.
If the chest fly is performed on a cable machine with relatively straight arms, the distance between the line of force (the cable) and the axis of rotation (shoulder joint) is shown below.
Now compare this to an adapted version with cable attachments placed above the elbow.
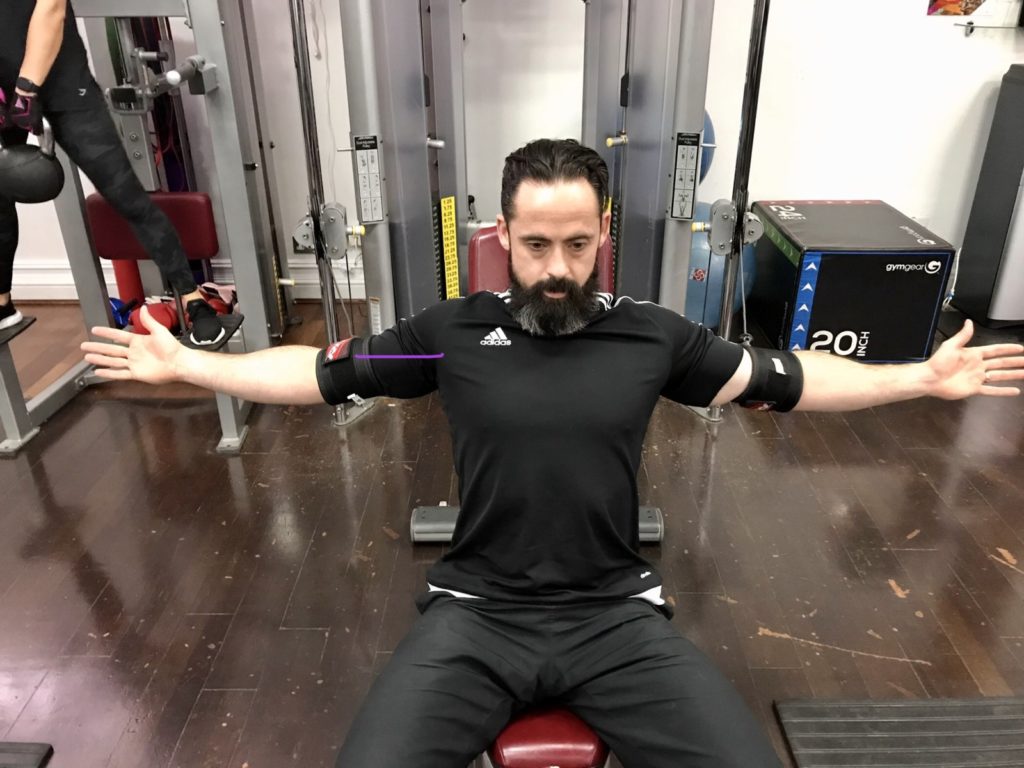
Reducing the moment arm in this way will dramatically alter the forces at the shoulder joint.
We’ll go through examples of how to do this for each exercise where possible.
3) Minimise the effects of inertia
Inertia is the resistance of any physical object (a dumbbell for example) to a change in its velocity.
If you attempt to rapidly accelerate a weight, this will require a force that’s many times greater than the number written on the weight itself. This Instagram post illustrates the effect perfectly.
For this reason it’s best to perform the recommended exercises in a slow and controlled manner.
In part 2 we discussed the properties of resistance bands and how they offer more force, the more you pull on them.
Likewise cable machines, dumbbells, and weight training machines will offer different forms of resistance.
Some cable machines reduce the effects of inertia through the use of pulley systems. You can check the cable machines in your gym by pulling the handles a set distance and noticing how far the weight moves.
If the weight moves less than the distance the handle moves, the machine will offer a friendlier resistance to your shoulders.
4) Build the exercise to match where you are stronger and weaker
This will already be considered in the exercises I recommend, but understanding this concept will help your training.
Just as moment arms are an influence on how difficult an exercise feels, there’s a further factor to consider.
As humans there are joint positions where we are able to generate more force than others.
This is because our muscles are typically strongest in their mid range position and weaker at either end of their range.
Exercises should ideally be designed to reflect this. There are many that offer precisely the opposite challenge however and should be avoided.
The face pull is a great example of this.
5) Experiment and explore
The large range of available motion at the shoulder is a curse for this article (I won’t be able to cover everything) but a blessing for you. If a particular angle is causing you issues, try a slightly different one.
If for example pressing dumbbells causes your shoulder problems at 90 degrees of abduction, then try 80 degrees, or 70.
Experiment and don’t get hung up on what you can’t do, just train what you can.
Right, ready for some exercise? Me too, let’s crack on.
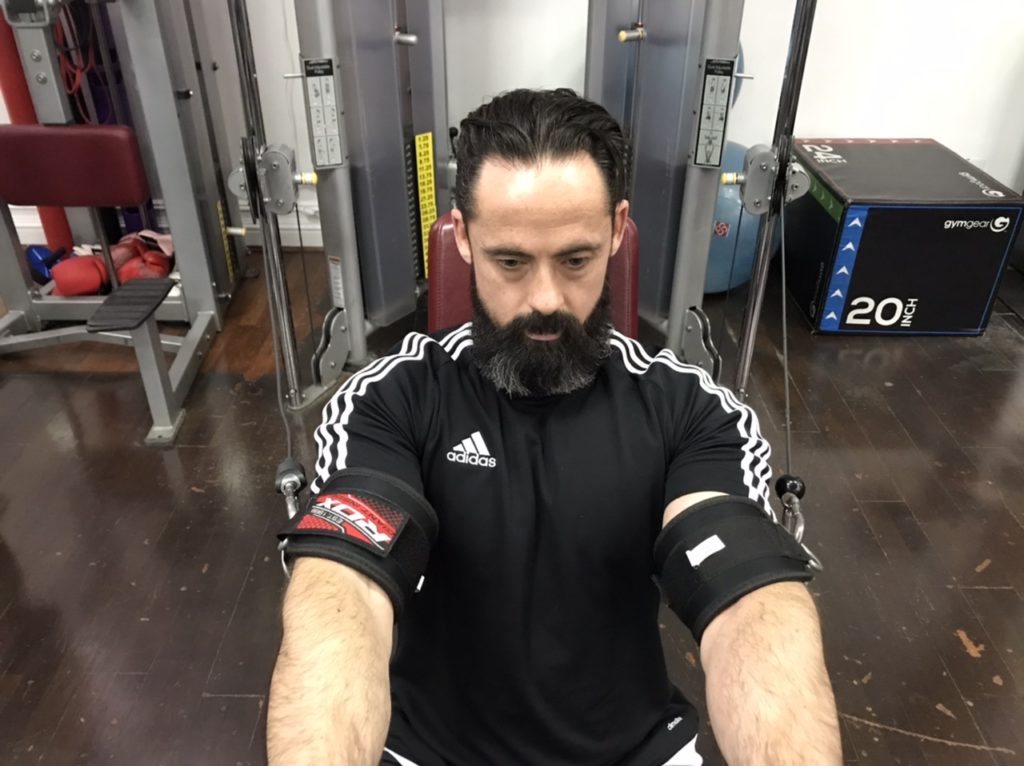
Seated cable chest press
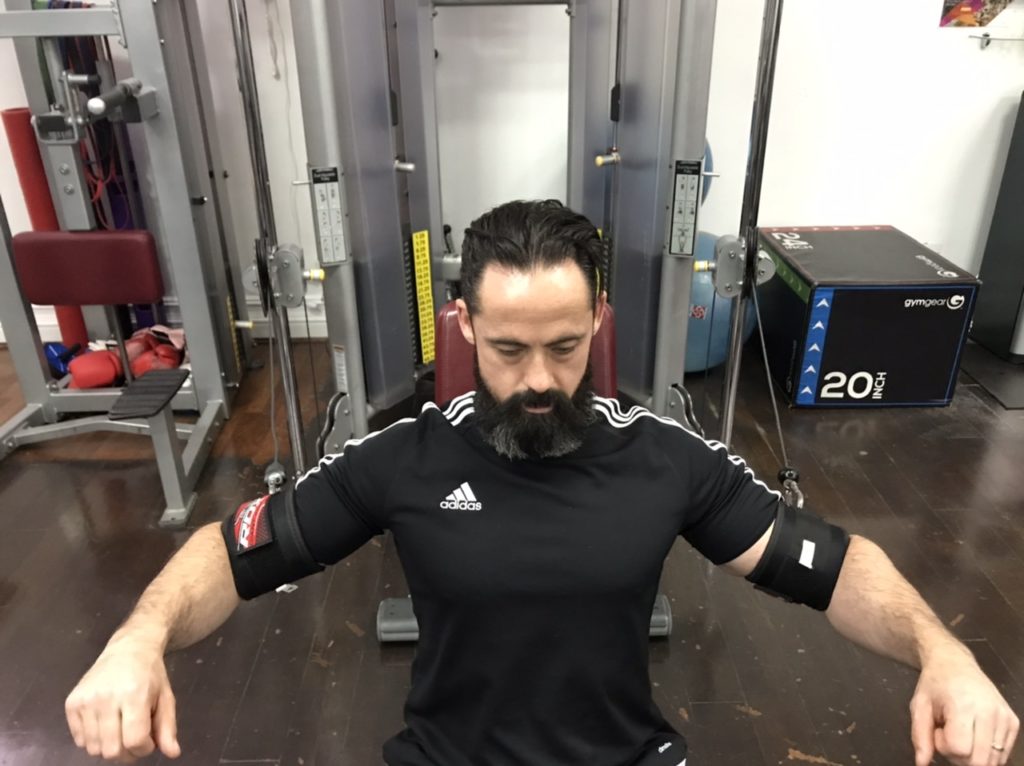
Pressing exercises tend to be neglected in shoulder rehab programmes but they are essential.
For this exercise use cable attachments above the elbow, for the reasons described above. This also removes any contribution from the muscles that extend the elbow, allowing a more focussed challenge.
Ensure you measure how far back your elbows are able to move under your control before you begin. Don’t let the resistance take you passed this point during the exercise itself.
Note also the closer the bench is to the cable machine, the larger the moment arm to the shoulder in the finish position.
Start with the bench further away as pictured and move it closer as you progress.
If you experience issues with your shoulder at 70-80 degrees of abduction, experiment with lowering the cable. This will enable you to press with your elbows closer to your side.
Aim to get your upper arm as close to your chest as possible in the finish position.
Choose a resistance that brings about fatigue between 6-8 repetitions.
Seated row
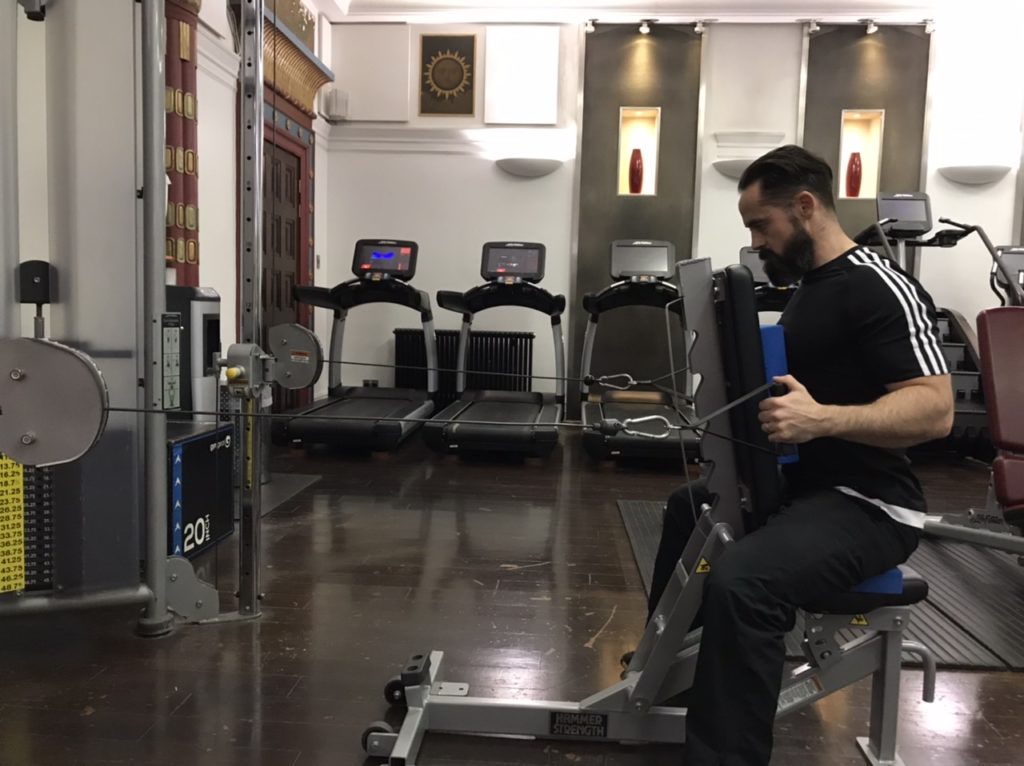
Here we’re using a cable machine set up to challenge the shoulder extensors and retractors.
The bench provides support for your trunk which will enable you to apply a greater load to the muscles of the shoulder.
Try this exercise both with and without support and you’ll find you have to reduce the weight when the support is removed.
Before you start, measure how far your shoulders are able to travel towards the cable (protraction) without moving your trunk. Don’t let the resistance take you further than this during the exercise.
Begin by first retracting your shoulder blades. Hold them in place before bending your elbows to bring the handles towards you.
Once your elbows are level with your trunk, slowly release back to the starting position.
Choose a resistance that brings about fatigue between 6-8 repetitions.
Seated overhead press
There are a wide variety of shoulder abduction angles to press through. From narrow (first image) to wider (second image).
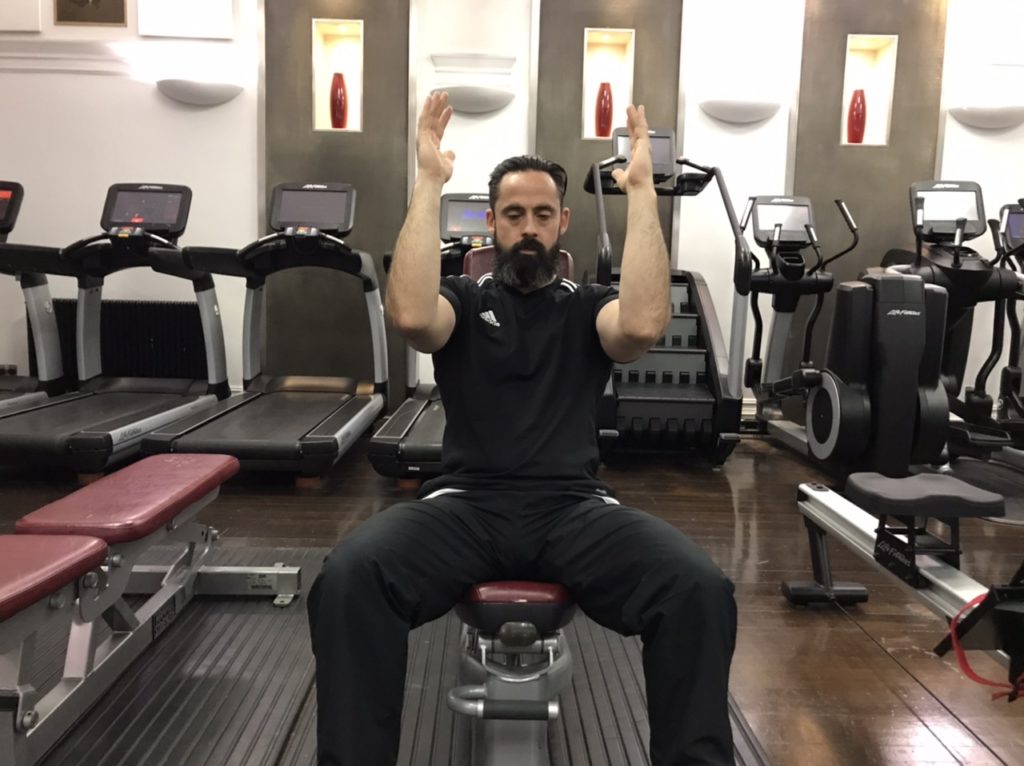
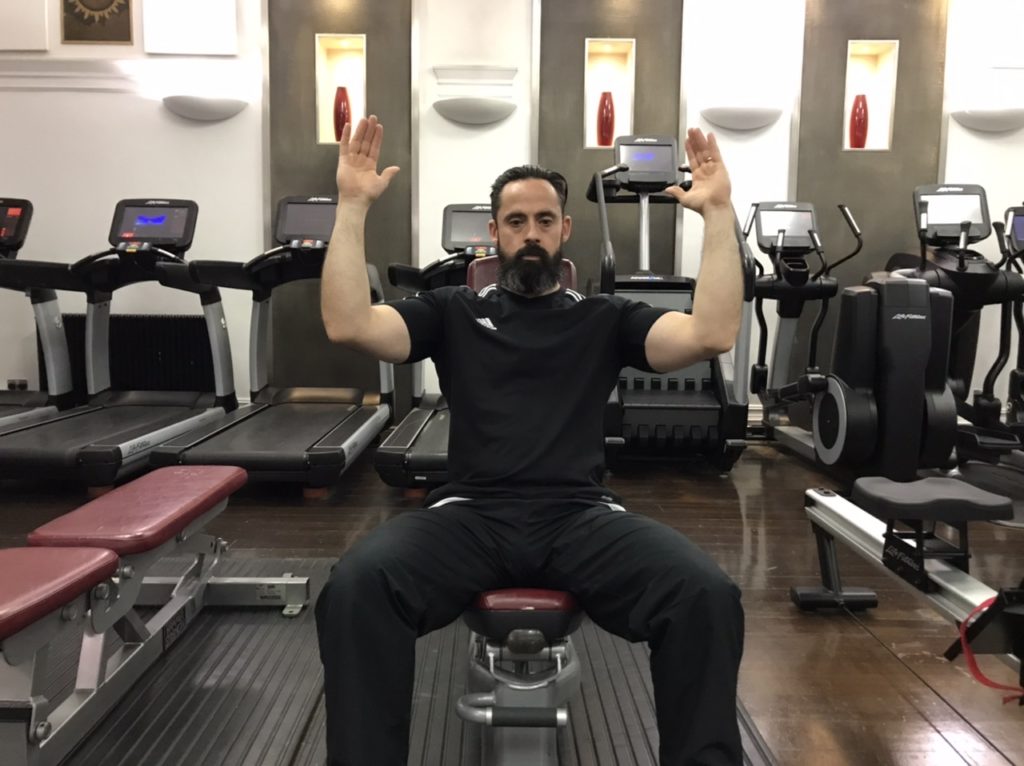
Whilst each position will bias different muscles, the important thing is that you’re able to perform the motion without issues.
Note that 90 degrees of abduction with full external rotation represents the close packed position of the shoulder joint. This is where the joint has maximum boney congruency and the ligaments are maximally taught.
It’s best to avoid loading into this position.
Sitting on an inclined weight bench for back support, press your arms overhead without additional weight from varying degrees of shoulder abduction.
Start narrow (elbows closer together) and work your way outwards (elbows getting further apart). Decide on a position of abduction that feels the most comfortable.
Make sure your shoulders have the ability to externally rotate a little in the position you choose. If not, move your elbows closer together.
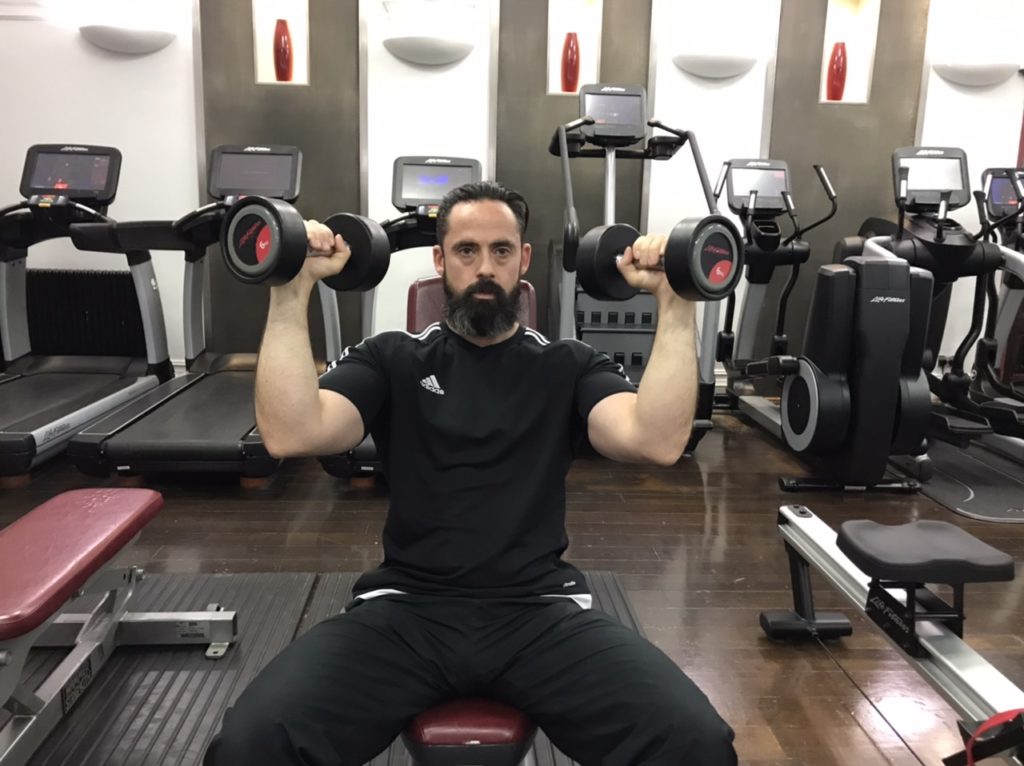
To begin the exercise select a pair of light dumbbells.
Sit upright on the bench with your elbows at shoulder height in your selected angle of abduction.
Slowly press the dumbbells overhead ensuring that your forearms remain perpendicular to the floor throughout.
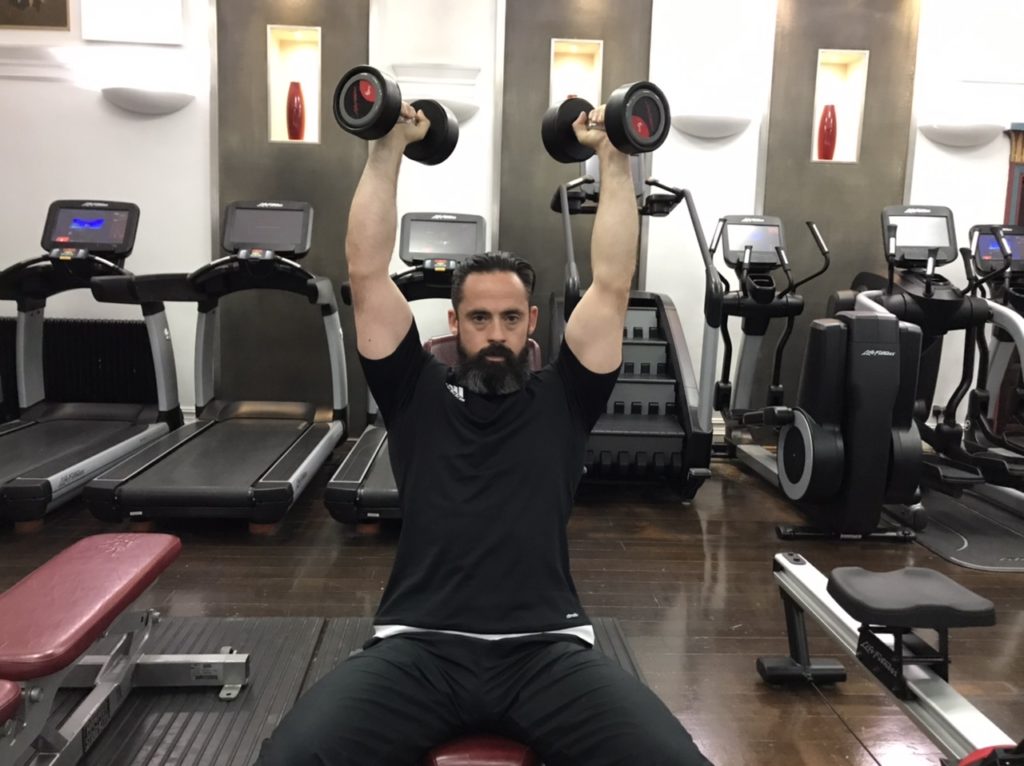
Aim to get your upper arms as close to your ears as possible before slowly releasing back to the start position.
Choose dumbbells that bring about fatigue between 6-8 repetitions.
Seated pulldown
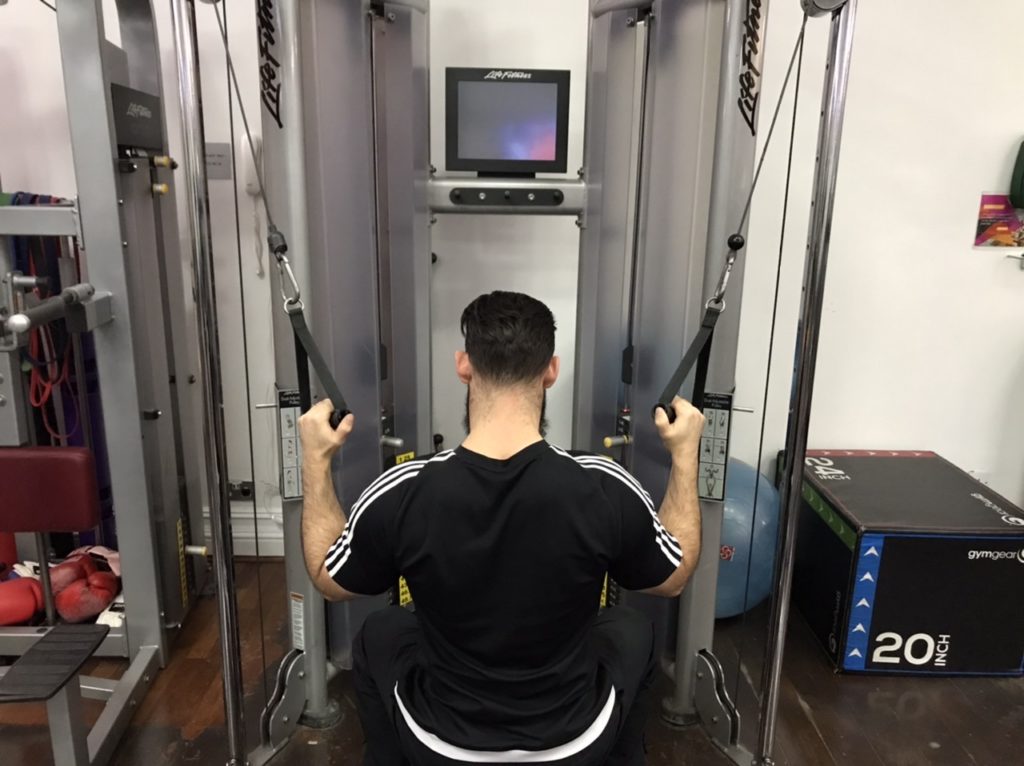
Just as you can press up from different angles, so you can pulldown from just as many.
Narrower grips will suit some shoulders, whilst wider grips will be better for others. Experiment with what feels comfortable.
Again avoid set ups that place your shoulders in the close packed joint position however. This will tend to occur with straight bars, which will also require your forearms to rotate to enable your hands to grip the bar.
The fewer joints you have at their end range positions, the more comfortable the exercise will be. Use handles that keep your forearms in a neutral position therefore, neither palm up or palm down.
We’re going to use a cable machine for this exercise from a seated position. If you are strong enough to use a resistance that might lift you from the seat, place weight plates on your lap to anchor your lower body.
Reach up towards the handles to ensure you have enough overhead motion to control the exercise. If you don’t, move the bench backwards.
To begin the exercise, bring your shoulder blades down towards the floor (depression). Hold them in place before slowly bringing the cable handles towards you by bending your elbows.
Have your focus on moving your elbows down and back rather than any flexion that is taking place at your elbow however. This will encourage you to use your shoulder extensors rather than your elbow flexors.
Once your elbows are level with your torso, slowly begin to return to the starting position.
Choose a resistance that brings about fatigue between 6-8 repetitions.
Note you can reduce any contribution from your biceps by using cable attachments fixed above your elbow. This Instagram post will show you how to set this up.
Summary
If you apply these exercises with care and attention to detail, your shoulders will benefit and you’ll get stronger.
In the final part of this shoulder rehab series we’ll look at how to challenge the deltoid muscle and both the long head of biceps and long head of triceps, which also influence shoulder function.