So you’ve rolled your ankle again. Use this ankle sprain rehab programme to get back to running, fast.
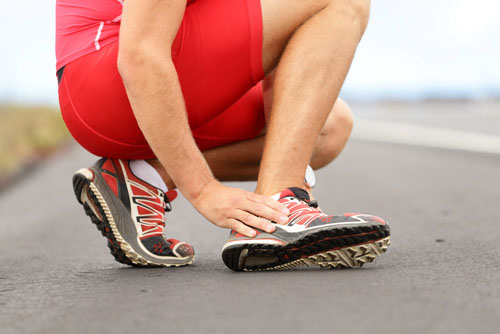
Time lost to any injury is frustrating, but ankle sprains seem particularly bothersome. Probably because in up to 80% of cases they will reoccur.
The exercises in this programme aim to prevent that from happening.
The majority of ankle sprains are inversion sprains (around 70-85%) which means your ankle has rolled inwards. It’s these type of sprains that I’ll focus on here due to their popularity with you running folk.
I should also say, given some sprains involve damage to the ligaments of the ankle and indeed bone on occasion, this programme should only be commenced once you’ve been cleared to begin rehab exercises by your supervising physician.
Phase 1 Restore communication
Any injury has the potential to reduce your ability to contract muscles on demand. This inhibitory effect promotes healing in the short term, by reducing the amount of force that enters the injured area. In the long term however, it can leave you prone to re-injury.
The first objective of this ankle sprain rehab programme is to ensure the muscles that protect your ankle from rolling inwards can contract when needed to prevent future ankle sprains.

This motion is primarily controlled by your peroneal muscles as they attach at various points on the fibula, before running over the outside of your ankle and attaching into your foot.
Various studies have shown them to have a delayed response (latency) to potentially threatening ankle motions in subjects who have suffered previous injury to their ankle.
I usually find them to be weak in clients who have suffered ankle sprains.
Studies have also shown that people who have suffered ankle sprains also tend to have weak hip abductor muscles on their injured side.
These muscles reside on the lateral aspect of your pelvis and provide your ankle protection from sprains by controlling how far your pelvis (and therefore your centre of mass) moves outside your base of support.
Isometrics to improve ankle stability
One of the best methods to improve a muscle’s ability to contract on demand is through low intensity isometrics. Isometrics are exercises where there is no change in either the working muscle’s length or the angle of the joint which the muscle acts upon.
Isometrics in the muscle’s shortest position restore the ability of the muscle to contract throughout it’s range and improve the stability of the joint or joints the muscle acts upon.
Peroneal isometrics
Complete the following exercises in the order given. Keep the effort level very low and focus on the muscle that you’re targeting. Repeat the exercises every other day for 2 weeks (minimum 6 sessions) before progressing to the strengthening phase.
Peroneus brevis (two exercises)
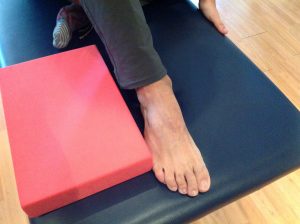
1) Lie next to an immovable object such as a table leg.
Please note, a yoga block is not an immovable object unless it is secured. We have used it here for demonstration purposes only.
Flex your hip and knee to 45 degrees and have your ankle in full plantarflexion (fully pointed downwards). Slowly rotate your foot outwards just 10 degrees keeping both the bottom of your foot and your toes flat on the floor. Have the object block you in this position and then very gently rotate your foot out into the object as if trying to move further.
Your effort level should be 10% of your maximum (very low in other words). Hold a sustained contraction for 6 seconds. Rest 10 seconds and then repeat a further 6 times. Think about the attachment sites of the muscle and try to feel it working.

2) Lying next to the same object, this time lift the foot to bring the ankle out of plantarflexion to neutral. Curl your toes down and very gently push directly out into the object again. Use the same timings as above.
Peroneus longus
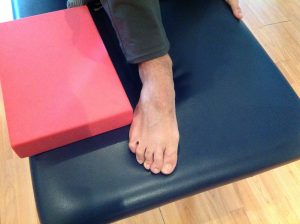
Keeping the same hip and knee angles, fully plantarflex the ankle again and this time rotate the foot out as far as it will go. Make sure the bottom of the foot and toes remain flat to the floor before pushing out into the immovable object as before.
Hold a sustained contraction for 6 seconds, rest 10 seconds and then repeat a further 6 times. Think about the attachment sites of this muscle and try to feel it working.
Peroneus tertius
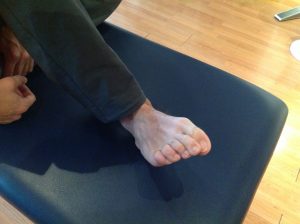
Curl your toes down and pull the foot back into dorsiflexion (top of the foot towards your shin) as far as it will go before again rotating it out fully. Hold this position imagining that your are attempting to keep the space between your lower leg and the 5th metatarsal (long bone that attaches to your pinky) unchanged. Use the same timings as the previous exercises.
Gluteus medius middle / anterior / posterior fibres
Now for those hip abductors. Lie on your back and slide the target leg away from the other as far as it will go. Make sure there is no rotation of the hip (knee cap remains pointing to the ceiling).
Have the immovable object block your leg just above the ankle and keeping the knee locked, gently push out. Hold for 6 seconds and repeat 6 times. Repeat the same exercise with both internal rotation of the hip (knee pointing inwards) and external rotation of the hip (knee pointing outwards).
Phase 2 Improve strength
So now you know the muscles that protect your ankle from a future ankle sprains are contracting better, it’s time to begin strengthening them in a more traditional sense.
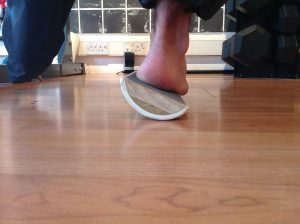
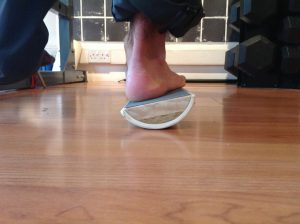
To begin I would highly recommend purchasing one of these foot rockers.
It is possible to create a somewhat similar effect with a short half foam roller such as this but due to the larger diameter you won’t be able to load the target muscles through their entire range which is a disadvantage.
It’s worth noting at this stage that the following is not a balance exercise. You will no doubt have been told to practice standing on one leg either on a wobble board or a Bosu as part of your rehabilitation.
These exercises merely recruit muscles that are currently contracting to help keep you upright. They do not however improve the ability of those muscles to contract through their entire range which is our goal here.
This is an important distinction and is one of the reasons why people keep rolling their ankles despite spending hours on unstable devices. Think of this exercise as a prerequisite for balance training.
Foot rocker exercise
Stand with the target foot on the foot rocker, making sure you are able to hold on to a wall with your opposite arm. With your weight over your working side, start by gently moving the device one way and then the other using your ankle through it’s full range of motion both inwards (inversion) and outwards (eversion).
Keep the speed very slow and focus on control by squeezing the muscles on the inside of your lower leg and then on the outside.
Repetitions are largely irrelevant, just aim to go to the point of mild fatigue before resting 2 minutes and repeating.
Standing calf raises
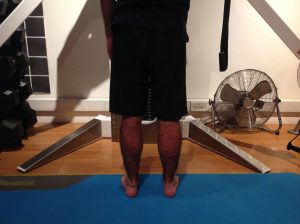
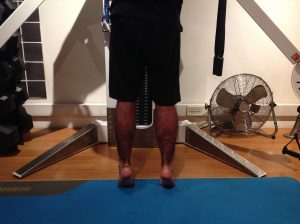
This exercise should form a major part of any ankle rehab programme and has the added advantage of not requiring any equipment. It trains the plantarflexors of the ankle which are involved in driving you forwards as you run.
If you are a mid-forefoot striker these muscles also play a significant role in helping you to absorb force as you strike the ground. The most frequent mistakes people make with this exercise are going too fast and not respecting their active range of motion.
Slow speeds are essential at the beginning of any rehab programme as they ensure the target muscles are loaded throughout their range. Your central nervous system will add speed where it senses weakness in order to bypass that particular tissue and complete the exercise. Don’t let it.
Use a 5 second shortening phase, a 1 second pause at the top end of the motion, followed by a 5 second lengthening phase and another 1 second pause at the bottom end of the motion. You will notice how much more difficult this is.
Respecting your active range of motion may be the single most important aspect of any exercise rehabilitation programme. Not doing so usually slows your progress.
If you are choosing to perform your calf raises on a step be aware that you don’t drop into more dorsiflexion at the bottom end of the motion than you can actively take yourself into.
Measure this at the beginning of the exercise by lifting the front part of your foot off the floor while standing straight. How far you are able to lift is how deep past the step you are able to safely go.
Use 2 sets to mild fatigue at the speed above with a 2 min rest between sets. Focus on getting your heel off the ground as far as you can.
Seated dorsiflexion
Dorsiflexion is the motion of bringing the top of your foot (dorsal surface) towards your lower leg. Very few runners train these muscles directly but they are critical in reducing the amount of force your foot has to absorb as you contact the ground, particularly if you are a heel striker.
If you have access to a gym then use a cable machine with the attachment around your mid foot. Otherwise a band with a decent amount of resistance will work. I prefer to do them sitting on the floor with the working leg stretched out in front of you.
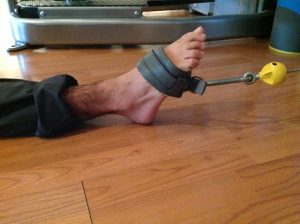
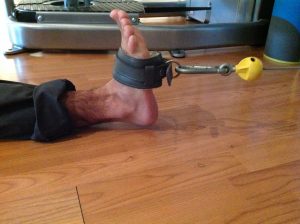
Use the same slow speed you are using with the calf raises and make sure you are able to achieve full dorsiflexion with each repetition, before slowly lowering the foot into full plantarflexion. 2 sets to mild fatigue with 2 minutes off in between.
Summary
Here you have the basis of an inversion sprain ankle rehab programme which I have used with many runners.
It’s different because it first ensures the muscles most likely affected by the injury are contracting again before very specific exercises are used to strengthen weak areas that we know contribute to ankle instability and recurring sprains.
Use it and hopefully you will enjoy strong, stable ankles that will keep you running faster for longer.
